kevin.fonner.net

        
- My Blog -     - My Projects -     - About Me -  
100 Acre Woods Nursery
Project Summary:

My 100 Acre Woods project is a nursery I designed and built for my son. I wanted more then just a Winnie the Pooh themed room, so I set out to create a room that would make anyone feel as if they were deep in the 100 Acre Woods. For the project I almost completely avoided commercialized Winnie the Pooh merchandise. I did not want a Winnie the Pooh retail store for my son's new room. I sought to create an imaginative world for my son to grow up through his younger years in. I want to show him that this world we live in is full of so many possibilities and that the world is what we make of it.

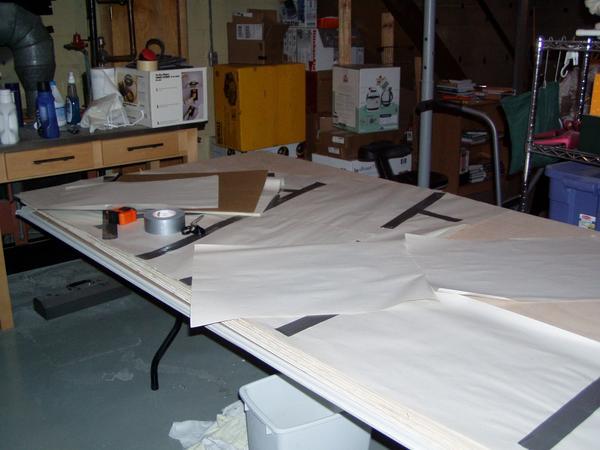
I should note that this is the first project for my new blog and so I have not been able to document it as well as I would have wanted. I only got around to setting up the blog about halfway through this project. I guess this will just give me some good content to launch my new site with.

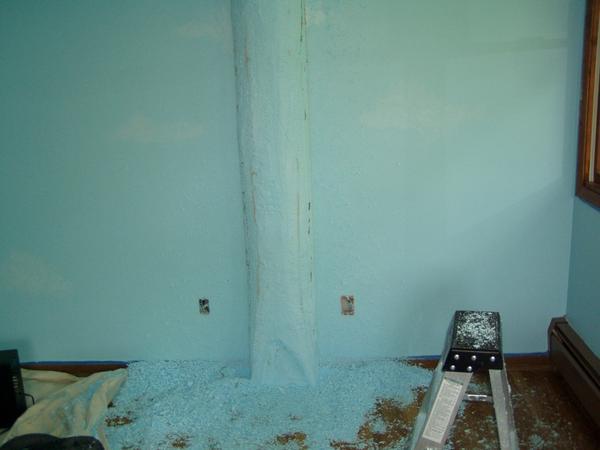
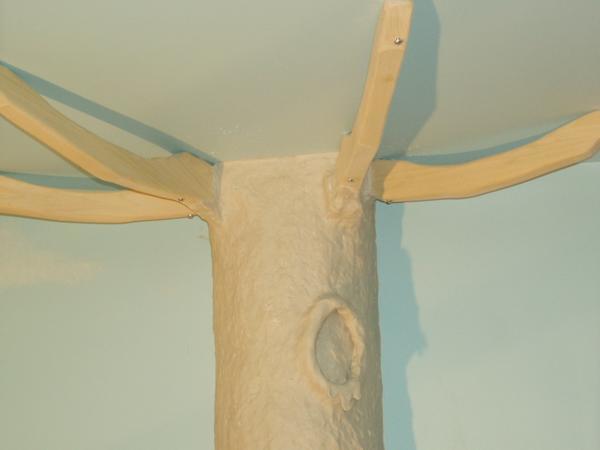
Anyways this project is quite interesting. It has two almost life size three dimensional trees made of wood, polystyrene, and clay. One of them has Pooh's house at the base. During the day you will see a blue sky with light fluffy clouds. Although at night I will have 300 hundred optic fibers to create stars in the ceiling. The trees even have realistic fireflies in their branches at night as well.

Wed Aug 03 00:00:00 EDT 2005

This is a picture of nothing but an almost empty room painted in the color Thoughtful Spot (Home Depot Disney Paint). This is where I plan on constructing the 100 acre woods. Here we go.

I’m beginning the project by putting together a small prototype to help me work out some of the details of the project. I’m not much of a model builder, but I think this will still help me a great deal.

Sat Aug 06 00:00:00 EDT 2005

Here I am creating a template for the pooh tree to help me with the stars for the nursery. I created this to be roughly the size of the tree canopy for the Pooh tree. When I go to wire the fibre optics for the stars I will place this in the attic where the tree will be so that I do not put stars in the tree.

Wed Aug 10 00:00:00 EDT 2005

I found it helpful to bundle groups of fibers with twist ties, and then run the bundles to various sections over the nursery. This kept my fiber optics more manageable.

OK, it took me a couple days to figure out what I was doing with the fiber optics to put the stars in. Here you can see a box of fiber with it lit up. You have to be careful with the fibers or else it turns into a bird’s nest really fast.

Mon Aug 15 00:00:00 EDT 2005

I’m testing the adhesive I will be using to glue the layers of polystyrene together. Make sure you use a polystyrene friendly adhesive!

Ok. Here is my ultra simple protype. Throughout the process of building my nursery I will use this to test various processes and methods before I do them for real on the full scale trees.

No I’m preparing to work out some more of the details with the prototype. Here is my base for working on the prototype pooh tree. You can see my photo which I pulled off of “The Many Adventures of the Winnie the Pooh” DVD and my digram which I created to work out some of the dimensions of the Pooh tree.

Sun Aug 21 00:00:00 EDT 2005

Here is a close up of the stars coming through the ceiling. After the paint dries, I will cut them flush against the ceiling. It should be very hard to see them in the day giving the look of a day sky during the day and a night sky at night.

Here I am touching up the paint for the sky around the three hundred fiber optic threads protruding through the ceiling. This will allow for the stars to be almost invisible during the day but come out twinkling at night.

Mon Aug 22 00:00:00 EDT 2005

Here you can see I am painting the clouds on the walls and ceiling of the nursery. They are kind of hard to see in the photo but they I am pretty happy with them.

Here I am cutting the stars flush to the ceiling after painting the clouds on the ceiling. You want to finish all the painting first so that the stars do not get covered up.

Thu Aug 25 00:00:00 EDT 2005

Here I am building the base of the pooh tree. I have to build it like this because the pooh tree is going on a wall with a baseboard and I have to build around the baseboard.

Here is photo of the front of the Pooh tree base.

Sat Aug 27 00:00:00 EDT 2005

Here you can see one of the tree trunk frames. It is just simple particle board that I constructed it out of.

Here is a photo of the honey tree frame attached to the wall. I used both toggle bolts and screws going into the studs to be sure it was secure.

Here is a picture of the Pooh tree frame attached to the wall. I have the Pooh tree base sitting below it. It will also be secured to the wall and floor.

Here is another shot of the Pooh tree trunk frame and base.

It was really hard to take a picture of the stars so it is impossible to show you just how amazing they look. They literally twinkle over head( due to a mechanism in the light) and look amazingly real. Here is a picture though of the orion constellation that I placed in the night sky over where my son’s crib will be. I was able to create this by doubling the fibers for the constellations.

Here is another shot of the night sky.

Mon Aug 29 00:00:00 EDT 2005

Here is the shot of the base of the Pooh tree with the door frame and fake door attached. The door is just made out of some bead board and 2×2’s.

Here is a closeup of the Pooh Door.

Here I am measuring the strips of polystryrene that I will be using to create the tree trunks.

Here I am cutting the polystyrene with a dremel tool. I later found out that it works much better with a jigsaw.

Here you can see how I am glueing the strips of polystyrene to the frame to create the tree trunk. Later I will carve the polystyrene to make it look like an actual tree.

Here you can see I used some long screws to help hold all the polystyrene together. I will glue one more layer on top to hide the screws.

Sat Sep 03 00:00:00 EDT 2005

Here you can see the tree frame with the layers of polystyrene being stacked around it.

Here I am cutting peices of polystyrene to fit around the pooh tree frame. I found a jig saw to be the best tool so far for cutting through the polystyrene.

Here I am glueing layers of polystyrene around the frame of the pooh tee. I will carve the polystyrene to create the pooh tree.

Here I am screwing down a peice of fiber board to better secure the poly styrene to the frame. It gets glued to the polystyrene as just another layer.

Sun Sep 04 00:00:00 EDT 2005

Here you can see me cutting the strips of the polystyrene for the tree trunks. Be sure to wear eye protection!

Here you can see the polystyrene for the trunk being glued into place.

Here is another shot of the polystyrene for the trunk.

Here you can see the larger pieces of polystyrene going into place. Clearly the pooh tree is a BIG tree.

Mon Sep 05 00:00:00 EDT 2005

Here I am beginning to carve the honey tree. I’m using wood shaping tools to mold the polystyrene into a tree like shape. Again, I’m trying this process out on the honey tree first because it is a much simpler structure then the Pooh tree.

Be careful if you like to whistle while you work! I had to breath through my nose to avoid inhaling polystyrene fragments. I would highly recommend a dust mask of some sort.

I use a smaller shaping cutter to do the finer work. The practice hear will come in handy when I am working on the pooh tree. You have no idea how much of a mess this stuff makes. The polystyrene also sticks to everything! Keep a vacume handy.

Here is the honey tree fully carved out. Not everything has to be perfect. Just a nice rough shape. There will be a layer of clay on top of this to work out any fine details.

Next comes branches for the honey tree. I used a jigsaw to cut out the branches. The wood is a poplar to make it easier for me to shape.

Some more branches being cut out.

Now this really wore my arm out. I used the same shaping tools to smooth out the branches. The reason I am using actual wood for the branches is so I have something solid to mount all the silk leaves to.

Here are the branches all carved out.

Here you can see the branches attached to the tree. They are not really attached to the tree. They are toggle bolted into the ceiling. This should provide adequate support for the leaves. Any small gaps are OK because we can fill them in when we do the clay.

Now comes another tedious process. The clay. I used an air drying modeling clay. It sticks pretty well but only if I sort of smear it on one thumb size clump at a time. I just sort of slowly work it onto the tree trying to smear it into the cracks in the polystyrene.

Wow this is going to take a while!

Strangely, this is pretty relaxing. Applying the clay this way also gives a very good appearance of bark.

Hey, it’s beginning to look like a honey tree. I create the honey dripping hole on the tree with clay. I’ll add the honey later after this has a chance to dry. But I am pretty excited at the way it’s turning out.

Another look at me molding the finer details into the tree.

Tue Sep 06 00:00:00 EDT 2005

Here you can see how I used clay to connect the branches to the trunk. You can also see how I used clay to mold honey dripping from the tree.

And there my friends is the honey tree all shaped and molded. Over the next couple days I plan to put two more coats of clay to help toughen the clay layer up.

Fri Sep 09 00:00:00 EDT 2005

Alright… Now the real fun begins. Carving the pooh tree is going to be an interesting challenge. Here you can see I started the tree trunk.

So I got bored of carving just tree trunks and decided to play around with carving the hill and tree roots around pooh’s house. I’ve just stated and look at all the polystyrene fragments! This is going to be messy good fun.

Another angle of the Pooh hill beginning to take shape.

The tree roots are beginning to show.

I cannot stress how messy this is. If you try a project like this be sure to keep a vacume handy. The polystyrene doesn’t fly around to much, but it sticks to everything, including you!

I kept a picture handy as I carved the tree out. I’m not a great artist, but it’s not to hard to make the tree roots look somewhat like the picture.

I didn’t have to be to super percise with the carving here. Just close enough. All the final details can be worked out when we cover the entire tree, roots, and hill with clay.

Here I am carving out the details of the tree.

Think, think, think.

Here you can begin to see the other side of the tree taking shape.

Another shot of the other side of the tree.

Sat Sep 10 00:00:00 EDT 2005

Here you can begin to see the tree trunk taking shape.

Sun Sep 11 00:00:00 EDT 2005

Now time to carve the branches of the great Pooh tree.

Here are all the tree branches for the Pooh tree. Again this was really tiresome for my arm.

Sat Sep 24 00:00:00 EDT 2005

I am now applying a layer of clay to the whole structure. This is just simple air drying modeling clay.

Earlier I forgot to take photos of the tree branches attached to the pooh tree. Here’s a shot. Again, they are not really attached to the tree… Just toggle bolted to the ceiling to look like they are part of the tree.

Here is photo of the tree at where I am currently.

Sat Oct 01 00:00:00 EDT 2005

Here I am putting more clay on the Pooh tree.

Hey, it’s beginning to look like a tree.

Sat Dec 24 00:00:00 EST 2005

After putting three layers of clay and a coat of primer on the tree, I am now putting a couple of coats of brown paint.

Here’s another shot of me painting the brown paint onto the Pooh tree. I painted the areas brown where there will be “grass” as well. I’ll add the green later.

Sat Feb 18 00:00:00 EST 2006

The wires that I am running now are for the firefly’s. Each wire has an LED light on the end of it. They are all controlled to brighten and dim individually to look like real firefly’s! After I finish putting the branches up I will thread the firefly’s into the leaves. At night I will then have stars in the sky and firefly’s in the trees. Sounds magical huh?

Here is another shot of the firefly wires.

Now I am beginning to fasten the silk leave branches to the main branches of the Pooh tree. I drill a small hole into the wood branches and then use clear silicon to secure the silk branches onto the tree. In this shot you can also see the firefly wires for the Pooh tree.

It’s really starting to look like a tree now! I’m excited!

Sun Feb 19 00:00:00 EST 2006

Here you can see the Pooh tree is starting to get full of leaves.

Another shot of the Pooh tree having it’s leaves attached. I find a simple staggered pattern for the silk branches work best.

Here is what the silk branches look like up close.

Sat Feb 25 00:00:00 EST 2006

I also decide to add some nice in wall speakers for background music and sound into the room.

Sat Mar 11 00:00:00 EST 2006

Next, I’m painting the grass green with a textured paint to also give the grass a bit of texture.

It takes a while to get the details right but I am pretty happy with the way the grass is turning out.

Next comes painting the details on the Honey Tree.

Another shot of painting the details on the Honey Tree.

Mon May 01 00:00:00 EDT 2006

Here is a shot of the skyline currently as it is in the 100 Acre Woods.

Here is a picture of the Pooh Tree Painted and with the leaves.

Thu Apr 12 00:00:00 EDT 2007

Ok…. I know I took for ever to finish the details on this project. Lot’s of stuff going on you know. But here it is… The 100 Acre Woods Nursery. The final detail on my list is to hang Pooh on a balloon from the ceiling next to the Honey Tree. After that… who knows, I seem to always get new ideas.

Another shot of Pooh’s Door.

I finally got around to putting up the Mr Sanders sign up.

What better way to relax with your son then in the 100 Acre Woods!

Find out how I created the 100 Acre Woods during my talk at Magic Meets!