kevin.fonner.net

        
- My Blog -     - My Projects -     - About Me -  
Kevin's Haunted Dungeon (2007 Additions)
Project Summary

These are the 2007 additions to my Haunted Dungeon which I set up for my Halloween Party every year. If you would like to see the original Haunted Dungeon you can see that here. My original plans this year were to build the Laboratory in the kitchen as an addition on to the dungeon. However, I asked myself, how will my guest get from the dungeon to the laboratory? Well, I decided that I needed to build some kind of tunnel. Well I could just build some straight walls like I did for the dungeon last year with a black plastic ceiling and arrange it like a tunnel.... or I could do a tunnel with some barrel vaulted ceilings!

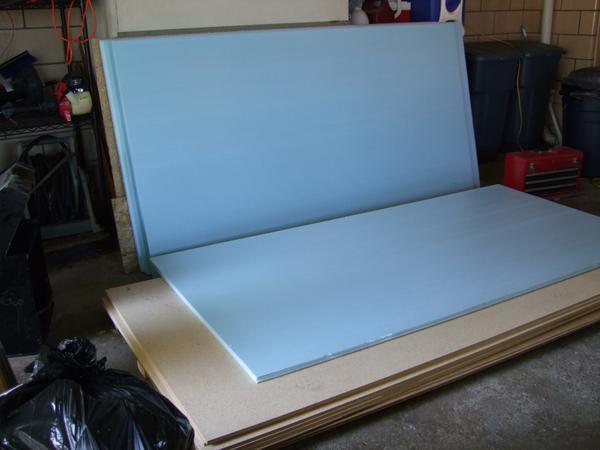
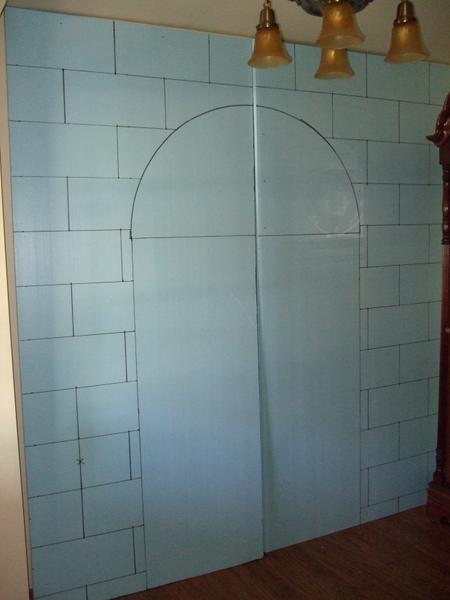
Of course I always choose the more complicated route and so I set off to create a tunnel with barrel vaulted ceilings. I didn't think the barrel vaults would be too difficult... I just bent some hardboard in a frame to make them. The real problem arose when I had to do a 90 degree turn. To explain, the dungeon tunnel goes from the dungeon (living room), through the dining room, and then turns at a right angle into the kitchen (now future site of the laboratory). To make the design of the straight barrel vaulted ceiling turn into the kitchen was turning into a pain.

Fortunately, a friend of mine told me about a Groin Vaulted ceiling. It was just what I needed for the turn, but now the tunnel was turning into such a complex project that I was not going to have time for the laboratory. The after thought project that was my tunnel to my laboratory was now my main project but boy what a tunnel it is. I spent much more time in the design phase with this project then the entire dungeon from last year. Even though it is relatively smaller, it was significantly more complex then the dungeon. Anyways, the laboratory will just have to wait till next year, but for now... here is my dungeon tunnel!


Sat Oct 06 00:00:00 EDT 2007

Here we go again. More Raw Materials!!

The First thing that I did was draw out my pattern for the entrance on the polystyrene panels and then stuck them where they were suppose to go to make sure they looked right.

Mon Oct 08 00:00:00 EDT 2007

Here is the entrance with the mortar joints routed out…

Here is one of the panels with it’s shape cut out.

Tue Oct 09 00:00:00 EDT 2007

Next I cut out finish molding (or what ever you call it) for the entrance to make it look more grand!

Thu Oct 18 00:00:00 EDT 2007

Next I cut out more strips of wood for more pillars for the dungeon.

Sat Oct 20 00:00:00 EDT 2007

Here are the frames for the two barrel vaulted ceiling extensions leading from the groin vault.

Here is a shot of the underside of the groin vaulted ceiling now that the foam has been filled in and sanded down.

So I bought some “Great Stuff” (the stuff you use to fill in cracks around outlets and stuff to better insulate your house) to basically fill in the cracks of my ceiling. It’s suppose to be sandable and paintable so I think it should work out great!

Here is a shot of the smaller pillars I built this year to support the tunnel.

Here’s another shot of the ceiling

Tue Oct 23 00:00:00 EDT 2007

Ignore the wallpaper! I have not had time to remodel this room since we bought this house (I’m too busy building dungeons). Here you can see one of the barrel vaults being put into place for the tunnel. This one leads to the kitchen.

Here is the other barrel vault piece ready to go into place. It will be the piece that extends into the dungeon.

Here you can see the lower half of the assembled tunnel. I forgot to take photos of the wall panels being finished up and the pillars being finished up but they were done exactly the same way as the first dungeon walls except that they are smaller. The wood running along the top of the wall is not yet painted… It’s going to get painted in place due to time contraints.

Here is a better shot of the tunnel walls being assembled. In the background you can see the groin vault piece sitting ready to be moved into place. It had to be positioned before the tunnel walls went up and the barrel vaults were in place because it is too large of a piece to be moved through the tunnel walls. Due to the size of the tunnel and the size contraints on the room that the tunnel goes through, assembly was almost as complex as the construction itself.

Mon Oct 29 00:00:00 EDT 2007

This in the new completed dungeon entrance. (Ignore the flood light I have setup to improve photo quality). I think it turned out pretty good. Next year I might add a few things to it though like sconces and stuff.

Here is a shot of the tunnel with the flash off. It gives you less detail, but a better idea how it looks in a darker setting. Its really hard to give you a good photo of the way the dungoen looks during my party. Lighting is a huge part of the experience and its hard for me to capture that with a camera…. or least for someone with my photography skills.

Here is a closer shot of the tunnel with the flash on.

Here is a closer shot of the groin vaulted ceiling in place.

Here is that same shot with the flash on.

In this shot you can see where the tunnel connects to the existing dungeon from last year.

And finally here is the completed tunnel going from the dungeon to the future laboratory. I don’t really have a very good entrance this year for the tunnel. The pumkin sconce you see on the right is really from the design from last year. Next year when the tunnel leads to the laboratory, instead of just the kitchen I’ll have a proper entrance. Happy Halloween!